


There is a universal kitchen phenomenon that every home cook knows all too well: the dark abyss of the deep pantry shelf.
You head to the kitchen with the best of intentions—maybe to whip up a mid-week dinner or prep for a weekend gathering—only to realize that the canned tomatoes you swore you bought last Tuesday have vanished into the shadows. In their place? Three half-opened bags of stale pasta, an expired jar of curry paste from two years ago, and a collection of snacks that have long passed their prime.
Deep pantry shelves are notorious space-wasters. Because they stretch so far back, items inevitably get pushed into the void, turning grocery management into an expensive guessing game where you end up buying duplicates of things you already own.
The good news? You do not need to drop hundreds of dollars on aesthetic designer bins or a custom California Closets overhaul to fix it. With a strategic game plan and some clever dollar-store hacks, you can master how to organize deep pantry shelves on a budget and transform your kitchen storage once and for all.
Step 1: Total Evacuation and the Great Purge
You cannot fix a messy system by just shifting things around. To get professional-grade results, you have to start with a blank slate.
- Clear Everything Out: Take every single item off your pantry shelves. Line them up on your kitchen counters or dining table so you can see the sheer volume of what you are working with.
- Check Expiration Dates ruthlessly: Toss anything expired. Be honest with yourself—if you haven’t touched that specialty flour blend in eighteen months, it is time to let it go.
- Group Like with Like: Categorize your items into distinct zones. Keep baking supplies together, group canned goods with canned goods, snacks with snacks, and oils and condiments in their own cluster.
This purging phase is the foundation of effective budget pantry storage. By seeing what you actually have, you stop wasting money on ingredients that are already hiding in your kitchen.
Step 2: Implement “Zone Defense” for Deep Spaces

When shelves are deep, vertical stacking and random placement are the enemy. If you have to move five items to reach the one you actually need, your system is bound to fail within a week.
Instead, divide your shelves into strategic zones based on frequency of use:
- The Golden Zone (Eye Level): This is prime real estate. Store your daily essentials here—school lunch snacks, breakfast items, and cooking oils you reach for every single day.
- The Upper Zone (High Shelves): Reserve these for lightweight items or things you use infrequently, like holiday baking supplies, large pitchers, or bulk paper goods.
- The Lower Zone (Bottom Shelves): Heavy items like bulk bags of flour, canned goods, and appliances belong down low where they are stable and easy to lift.
Step 3: Hack Your Storage with Budget-Friendly Alternatives
One of the biggest misconceptions of home organization is that everything has to match and come from high-end specialty stores. If you look at viral home organization videos, you will see $20 acrylic bins everywhere. But on a real-world budget, you can get the exact same functional result for a fraction of the cost.
When working on deep pantry organization ideas, look around your house or local discount stores for creative containers:
- Repurposed Shoeboxes and Amazon Boxes: Wrap sturdy cardboard shoeboxes in leftover contact paper, wrapping paper, or fabric. They make phenomenal, free pull-out bins for loose packets of seasoning mixes, tea bags, or snack bars.
- Dollar Store Baskets: Plastic woven baskets from budget stores are game-changers for deep shelves. Instead of reaching into the dark for a bottle of soy sauce, you place all your sauces inside a plastic bin. When you need something from the back, you simply slide the whole basket out like a drawer.
- Clear Re-sealable Containers: You don’t need expensive glass jars to keep bugs out of your dry goods. Affordable plastic cereal dispensers and airtight containers keep pests away while making your dry goods look uniform.
Step 4: Conquer the Depth with Staged Heights (Risers and Turntables)
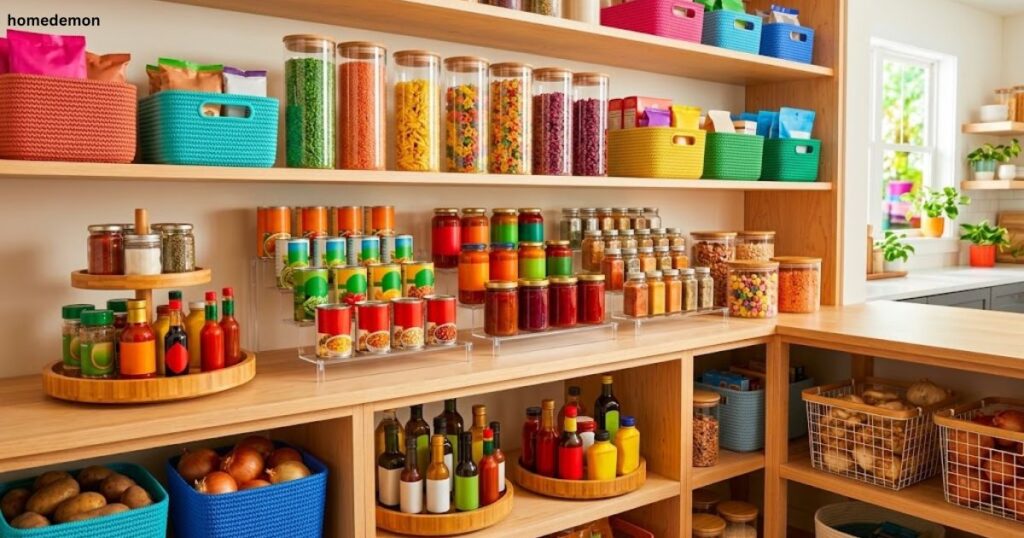
In a deep pantry, items hidden behind other items are practically invisible. To solve this, you need to create artificial elevation.
- DIY Shelf Risers: You don’t need to buy metal risers. Turn an empty, sturdy shoebox upside down on your shelf, or place a small wire cooling rack over a group of low items. Put your shorter cans or spices on top, and store taller items underneath or around it. Now, everything is visible at a glance.
- Lazy Susans (Turntables): These are absolute magic for deep corner pantries or awkward side shelves. Place a cheap plastic turntable in the corner for condiments, dressings, or oils. A quick spin brings everything right to your fingertips, eliminating the dreaded “knock-over domino effect” in the back of the shelf.
Step 5: Label Like a Pro
The final touch that separates a temporary tidy-up from a permanent lifestyle change is labeling. When every category has a designated home, family members (and guests) are far more likely to put items back where they belong rather than tossing them randomly into the nearest gap.
You don’t need a fancy electronic label maker. A simple roll of masking tape and a black permanent marker, or a chalkboard sticker set from a dollar store, works wonderfully. Label the front of your bins or shelves with clear categories like Sweets, Grains, Canned Goods, or Breakfast.
Maintain Your Masterpiece
Organizing your pantry on a budget is deeply satisfying, but the real victory is keeping it that way. Once a month, take ten minutes to do a quick reset before your weekly grocery run. Wipe down the shelves, check for any stray crumbs, and return items to their designated zones.
By utilizing clever bins, creating tiered heights, and grouping your items logically, you have turned a chaotic black hole into a high-functioning kitchen asset—all without breaking the bank.
Quick Summary Checklist for Budget Pantry Success
- Empty everything and toss out expired goods.
- Establish distinct zones based on how often you use items.
- Use budget-friendly containers like shoeboxes and dollar-store baskets to create pull-out drawers.
- Elevate visibility using DIY risers and Lazy Susans to conquer deep corners.
- Label your bins to maintain long-term organization habits.

Welcome to Home Demon! I’m Ameer Hamza, an SEO and Content Writing
Expert specializing in Guest Posting, with 3 years of experience.
I help websites rank higher, grow traffic, and look amazing. My goal
is to make SEO and web design simple and effective for everyone.
Let’s achieve more together!